Grab Our Blinkie

Groups We Love


Certified

Lifetime Member

Favourite Blogs


Friday, February 28, 2014
**CT VERYMANY - Estelle**
Hello everyone!
Today I have new tags to show you off.

I'm using stunning new tube 'Estelle' by Verymany
It's perfect for all kind of tags and any theme.

-xoxo al3x-

Wednesday, February 26, 2014
**CT PTU TUTORIAL - Beautiful Garden**
-nick.png)
*This tutorial is written by me using Photoshop CS6 but any version will work.
Any similarity to any other tut is coincidental.*
Supplies:
Tube of choice. I'm using the artwork of Tamandya.
You must purchase a license to be able to use his work.
Kit of choice. I'm using PTU kit 'Beautiful Retro'
Mask of choice. FM2
Font of choice. Hemmet
Let's get started...
Open new canvas 600x600.
From the kit past Frame 1, Flip Horizontal and place it at the center,
little more to the right side. Drop Shadow - Opacity 40%, Distance 3,
Size 4. Now go down and click 'background' layer. Past Paper #2,
resize it and place behind the heart whole. Add the tube, right click
on layer and Create Clipping Mask. Set Opacity on 45%. Then make a
copy of that layer and set Opacity to 100% and Blend Mode on
Lighten, add filter Gaussian Blur. At the botom left side place
Element #38, shadow. On it place 3 copies of Element #14 with shadow
on all. Then add Elements #18 and #19 with shadow. On the frame
right side add Element #12, shadow. Then click on the first
element we added, frame 1. On it past Elements #23 and #28 with
shadow on both (place them at the bottom frame rose). Next to them
add 2 copies of Element #23 and 1 copy of Element #12, shadow.
On them past Element #16, shadow. On there, but more at the canvas
bottom, rotate and place Element #15 with shadow. Then place
Elements #46 and #23 on it, with shadow. Now at the bottom left,
where we already have some element, add Element #38, shadow.
On the top left side, next to the frame, past Element #12 with
Drop Shadow - Opacity 40%, Distance 3, Size 4. On it place Elements
#49 (rotate) and #16, shadow on both. Then add another copy of
Element #12 on it, shadow. Then past Element #16 (flip horizontal),
#49 (rotate) and #16 with shadow on all. Next to those place full
size tube with Drop Shadow - Opacity 55%, Angle 180, Distance 3,
Size 4. At the bottom, on the tube right leg, place Elements #36
and #16 with shadow on 40%.
Now let's add mask:
Open your mask as new image.
Mask layer will be called 'Background' and will be locked.
Double click on same layer, press OK. Layer name will be 'Layer 0'.
Add a new layer above it and flood fill with color of choice,
or use a paper from kit . I use Paper #3.
Click on mask layer and hold CTRL+A to Select All, CTRL+C to Copy.
Click on the paper layer, hit Q to turn on Quick Mask mode.
CTRL+V to paste the mask. It should now be kinda red.
Hit Q to turn off Quick Mask mode
and there should be shown selection on your canvas.
Hit the Add Layer Mask.
On paper layer, right click and Convert to Smart Object.
Right click again and Rasterize Layer.
Drag completed mask to your tag canvas as the bottom layer.
Resize it if needed.
Add proper copyright and your name on tag.
Hide or delete bottom 'Background' layer. And save your tag as .PNG file.
-cat.png)
That's it! Thank you for reading. I would love to see any tags made with this tutorial. You can past the link here as comment or send them to me on al3x_v@ymail.com

Saturday, February 22, 2014
**CT Collab Kit - Perfect Harmony**
Today I have something awesome to show you!!!
Dees'Sign Depot and Tiny Turtle Designs
made stunning collab kit.
Currently on sale with 30% off at both

Kit is called 'Perfect Harmony'. Beautiful musical theme kit
with earth colors that will bring to life your creations.
Comes with 100 elements and 22 papers.

Tub use is by Tatjana Art at TPP store.
Kit Preview:

-xoxo al3x-

Thursday, February 20, 2014
Perfect Harmony CT tags show off
Woohooa. Check this out. NEW IN STORE!
Gotta say this collab kit between Tiny Turtle Designs and Dees'Sign Depot is just amazing!!!
I love everything about this kit!
Colors are gorgeous, elements amazing and papers are awesome!
Colors are gorgeous, elements amazing and papers are awesome!
I hope I will see more collabs between those two designers. They rocked this one.
Collab is available in both stores:
Tiny Turtle Designs HERE or
Dees'Sign Depot HERE and is currently ON SALE for 30% Off!

I used gorgeous artwork of Jennifer Janesko, available at CDO.
http://www.cdoestore.com/
I used both portions of the collab.

I had one more play with the kit. I used both collab portions.
I used Jasmine Becket-Griffith artwork which is available at CDO.

I LOVE this kit :D
Thanks for stopping by.
Hugs...

**CT tag - Verymany & A Space Between**
For today I'm showing off my new CT tag
with stunning new tube 'Becky' by Verymany.

Tube is multilayered with bright and happy colors
for shirt and jeans. Will fit perfectly for
your creations inspired by spring.

For this tag I also used gorgeous PTU kit
'Lil Bits Of Spring' by A[S]B Design.
Comes with 65 elements and 16 papers.
with 25% off for a limited time.
Kit Preview:

-xoxo al3x-

Wednesday, February 19, 2014
**CT DEES'SIGN DEPOT - Precious Love**
Hi all... Today I'm showing off my new CT tag.
Using stunning bonus kit 'Precious Love'
by Dees'Sign Depot. This beauty is free when

It's really soft and lovely kit. Comes with
110 elements and 20 papers.
Artwork by Zindy S.D. Nielsen.
Kit Preview:

-xoxo al3x-

Verymany - Feeling Fresh
New CT tag show off using gorgeous new Verymany tube called Becky.
She is released today and in the VMT store HERE .
Scrap kit is from Dee at Dees'Sign Depot called Feeling Fresh
and available in her store HERE.

Tube is multilayered. I really liked yellow layer so had to use it :)
Kit and tube are must have for coming spring.
Dee has sale going whole February , you can get the kit for $1.75.

Thanks for stopping by.
Have a nice day.
Hugs...

Tuesday, February 18, 2014
CT tag show off - Tiny Turtle Designs
Hello everyone! I am glad I finally got some extra time to make some CT taggies.
I recently started doing blog layouts and well, it takes a lot of mine time.
I am glad it does :) I love doing it.
This time I played with Tiny Turtle Designs Vintage Spring kit.
The kit is available in the store HERE.

Forum set show off featuring artwork of Verymany.
Tube is called Marianne and available in the store HERE.
PTU scrap kit Vintage Spring from Tiny Turtle Designs.

CT tag featuring the artwork of Zindy S. D. Nielsen.
Tube available in Zindy's store HERE.
Vintage Spring kit used as well.

Thank you for stopping by.
Hugs..

Friday, February 14, 2014
**CT PTU TUTORIAL - Happy Valentine**
-n.jpg)
*This tutorial is written by me using Photoshop CS6 but any version will work.
Any similarity to any other tut is coincidental.*
Supplies:
Tube of choice. I'm using the artwork of Ninaste.
You must purchase a license to be able to use their work.
Kit of choice. I'm using PTU kit 'Cupid Queen'
Font of choice.
Let's get started...
Open new canvas 600x250.
From the kit past Paper #8, resize to fit the canvas. Then at the
center place full side tube and make a copy of it. On original tube
layer set Opacity on 60%. And for the copy layer set Blend Mode on
Screen then add filter Gaussian Blur. On both left and right side
of the tube place Element #70 with Drop Shadow, Opacity 40%. Then
past Element #75 and place it at the left side. On it add Element #21.
Select those two elements and Convert to Smart Object. Add shadow
then on 40%. On it place Element #70 again with shadow. Next to
the big heart, on the right side place Element #77, shadow. Between
those two add Element #113, shadow. Now past Element #146 and place
it on the big heart left side, shadow. On the hill place Element #78.
Add Element #1 and place it between the shoes and cherries, Drop
Shadow on 40%. On it past Element #98, shadow. Then place Element #114
at the bottom center with shadow. On the right side of it add
Element #77 again, shadow. On it place one more copy of Element #70
with shadow. At the canvas top, on the tube, add Element #22, resize
to be bigger. Using Eraser Tool remove the dots. For that element
add shadow on 50%, Distance 3 and Size 2. Also add Outer Glow,
Opacity 100% with size 3. Now add again full size tube, but resize it
to be smaller and place at the right side. Add Drop Shadow, Opacity
55%. Now we need to add small boarder. For that I use full line brush.
Add proper copyright and your name on tag.
And save your tag as .JPG file.
-l.jpg)
That's it! Thank you for reading. I would love to see any tags made with this tutorial. You can past the link here as comment or send them to me on al3x_v@ymail.com

**DEES'SIGN DEPOT - Valentine's day sale**
Today I have something awesome to tell you!!!
Dee is having awesome 2 days sale on all of hers
Valentine kits!!! Hurry up and grab those 8 kits and

I also have tag to show off with one of those
love kits that'r are on sale. Using

In this kit you can find 70 elements, 7 frames
and 18 papers. It's really beautiful.
Artwork by Anna Marine from CDO store.
-xoxo al3x-

Wednesday, February 12, 2014
**CT PTU TUTORIAL - My Heart...**
-spazz.png)
*This tutorial is written by me using Photoshop CS6 but any version will work.
Any similarity to any other tut is coincidental.*
Supplies:
Tube of choice. I'm using the artwork of Spazz.
You must purchase a license to be able to use their work.
Kit of choice. I'm using PTU kit 'My Heart For You'
Mask of choice. DD_WinterMask_10
Font of choice. Pussycat
Let's get started...
Open new canvas 440x660.
First we gonna add the tube and place it in the center, little more
to the top canvas. With Drop Shadow, Opacity 55%. Then click on the
'background' layer. We'll add mask now. Open your mask as new image.
Mask layer will be called 'Background' and will be locked.
Double click on same layer, press OK. Layer name will be 'Layer 0'.
Add a new layer above it and flood fill with color of choice,
or use a paper from kit . I use Paper #3. Click on mask layer
and hold CTRL+A to Select All, CTRL+C to Copy. Click on the paper
layer, hit Q to turn on Quick Mask mode. CTRL+V to paste the mask.
It should now be kinda red. Hit Q to turn off Quick Mask mode and
there should be shown selection on your canvas. Hit the Add Layer Mask.
On paper layer, right click and Convert to Smart Object. Right click
again and Rasterize Layer. Drag completed mask to your tag canvas
as the bottom layer. Resize it if needed. Then from the kit past
Element #30, rotate a little and place at the right side with Drop
Shadow, Opacity 40%. Make a copy of it, Flip Horizontal and place
at the left side. Between those two place Element #38, shadow.
Now add 2 copies of Element #26 on the right frame side with shadow.
On it add 2 copies of Element #53 with shadow on 40%. And then
place Element #24 on it, shadow. On the frame left side, where's
tube elbow, add Element #26 and on it #53 with shadow on both.
Under it place Element #8, shadow. On it past Element #33 with
shadow. Make a copy of it, Flip Horizontal and place on the right
side. Next to it add Element #8, shadow. On it add Element #53 with
shadow on 40%. Make a copy of, Flip Horizontal and place at the
left. Then add 2 copies of Element #43, one on left and other on
the right side of the tube. Drop Shadow on both. On both of those
place a copy of Elements #47 and #40 with shadow on all. Now click
on tube layer. On the right side add Element #5, shadow. And on
the left place Element #47 with shadow. At the bottom, between
two black circles, place 2 copies of Element #53 with shadow.
On them add 2 copies of Element #60. On the bottom right past
Element #52, shadow. On it place Element #47 with shadow. Then
on the left add Element #22. Above it place Element #59, shadow.
Add Element #46 on it with shadow. Make a copy of it, Rotate 180
and place on the right side. Above that one place Element #37,
shadow. Cover the ribbons with Element #61, shadow. Add Element #9,
rotate a little and place it at the center, a bit more to the
left. Using Eraser Tool remove the ribbon from it and then shadow.
On it place Elements #23 and #35 with shadow. Next to it place
Element #1 with shadow on 40%.
Add proper copyright and your name on tag.
Hide or delete bottom 'Background' layer. And save your tag as .PNG file.

That's it! Thank you for reading. I would love to see any tags made with this tutorial. You can past the link here as comment or send them to me on al3x_v@ymail.com

Loneliness CT TAG show off
Dee did it again! I am in love with hers new revamped kit called Loneliness.
So fresh colors she used to make this kit. Yellows and greens does such nice combo.
The kit is already in store and you can buy it HERE.

Here is CT tag show off using Dee's Loneliness PTU kit and
gorgeous artwork of PinUp Toons available HERE.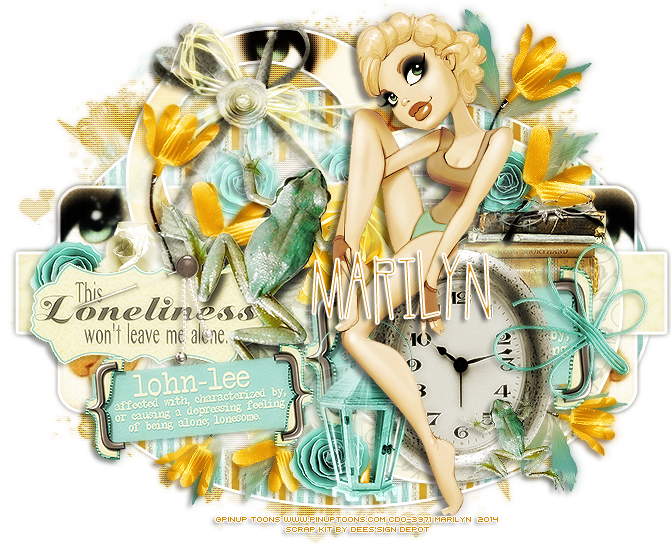
Thank you for stopping by. Have a nice day.
Hugs...

Tuesday, February 11, 2014
**CT PTU TUTORIAL - Love Garden**
-nick.png)
*This tutorial is written by me using Photoshop CS6 but any version will work.
Any similarity to any other tut is coincidental.*
Supplies:
Tube of choice. I'm using the artwork of Tamandya.
You must purchase a license to be able to use their work.
Kit of choice. I'm using PTU kit 'Spring Harmony'
Template of choice. 505mpm
Mask of choice. WSL_Mask84
Font of choice. Andantino script
Let's get started...
Open template. Hide or delete 'cr' layer. Now go to the last layer
and also hide or delete layers 1 and 2. Click layer 3 and from the
kit past Paper #32. Right click on the paper and Create Clipping Mask.
Now past Element #78 and place at the top right side with Drop Shadow,
Opacity 40%. Make a copy of it, Flip Horizontal and place on the left
side. Place Element #61 then on the left side, shadow. On it add
Element #58. Using Eraser Tool remove extras then shadow on 40%.
Select the last 2 elements and make a copy of them. Flip Horizontal
and place at the right side. On the left side place Element #73 and
on it Element #39. Drop Shadow on both. Click on the layer 4 then
and from the kit past Paper #29 to Create Clipping Mask. I used
pattern on the paper to spice it up a little. If u decide to do that,
then your pattern have to be transparent and Blend Mode set to Soft
Light. For the layer 5 Create Clipping Mask with Paper #6. Now past
full size tube, don't resize it, Flip Horizontal and place on the
oval. CC mask for tube as well and filter or effect of choice.
Then from the kit past Element #62, rotate and place on the left
oval side. Make a copy of it, Flip Horizontal and place on the
right side. Make another copy of that element, rotate and place at
the top center on oval. Using Eraser Tool remove some flowers.
Add shadow on all 3 copies then, Opacity 40%. On the oval, next
to the tube, place Element #7, shadow. On it add Element #58 with
shadow. At the bottom of it place Element #34 with shadow. On it
add Element #35, shadow. At the canvas bottom left side past
Element #17. Make a copy of it, Flip Horizontal and place at the
right side, shadow on both. On those two add Element #77 on both
sides with shadow. Then add 2 copies of Element #46 at the bottom,
shadow on both. On those past Element #65, no shadow. Also add 2
copies of Element #76 on left and right side, shadow. Then at
the bottom right place Element #36, shadow. On it past Element #21
with shadow on 40%. At the bottom left side place Element #41 and
on it add Element #35, with shadow on both. Now click on the
layer 7 and then place full size tube at the right side, with
shadow on 55%. For the layer 8 use some yellow style
and for the 9 and 10 use green.
Now let's add mask:
Open your mask as new image.
Mask layer will be called 'Background' and will be locked.
Double click on same layer, press OK. Layer name will be 'Layer 0'.
Add a new layer above it and flood fill with color of choice,
or use a paper from kit . I use Paper #7.
Click on mask layer and hold CTRL+A to Select All, CTRL+C to Copy.
Click on the paper layer, hit Q to turn on Quick Mask mode.
CTRL+V to paste the mask. It should now be kinda red.
Hit Q to turn off Quick Mask mode
and there should be shown selection on your canvas.
Hit the Add Layer Mask.
On paper layer, right click and Convert to Smart Object.
Right click again and Rasterize Layer.
Drag completed mask to your tag canvas as the bottom layer.
Resize it if needed.
Add proper copyright and your name on tag.
Hide or delete bottom 'Background' layer. And save your tag as .PNG file.
-laura.png)
That's it! Thank you for reading. I would love to see any tags made with this tutorial. You can past the link here as comment or send them to me on al3x_v@ymail.com
**CT VERYMANY - Kimberly**
Hi all ♥ Today I have new tags to show off.
Using gorgeous brand new tube 'Kimberly' by Verymany

This beauty is multilayered, so it will
fit perfectly in any tip of tags.
It's a mush have!!

-xoxo al3x-

Subscribe to:
Posts
(Atom)
Alex CT For


Marilyn CT For
Check Me!
AD Service
Marilyn AD Service
If you have more questions, or interested in purchasing the product contact me via dina.gaco@hotmail.com; or FACEBOOK Dina Marilyn ...

Favourite Stores